Create and configure a proxy
Summary
This tutorial will cover how to create a proxy using the GrantProxy extension. It will also cover the various settings that can be configured for your created proxies. Proxies can be used by any software that supports HTTP proxies with authentication.
Setup required before using proxy
It's important to note that you'll need to do some setup before you can use a proxy server created by a GrantProxy user. Please see Configuring your system to use a shared proxy for more information on how to do this.
The default proxy server
By default when you install the extension, GrantProxy automatically creates a proxy with the name Default Proxy. This can be found under the My Proxies tab of the extension:
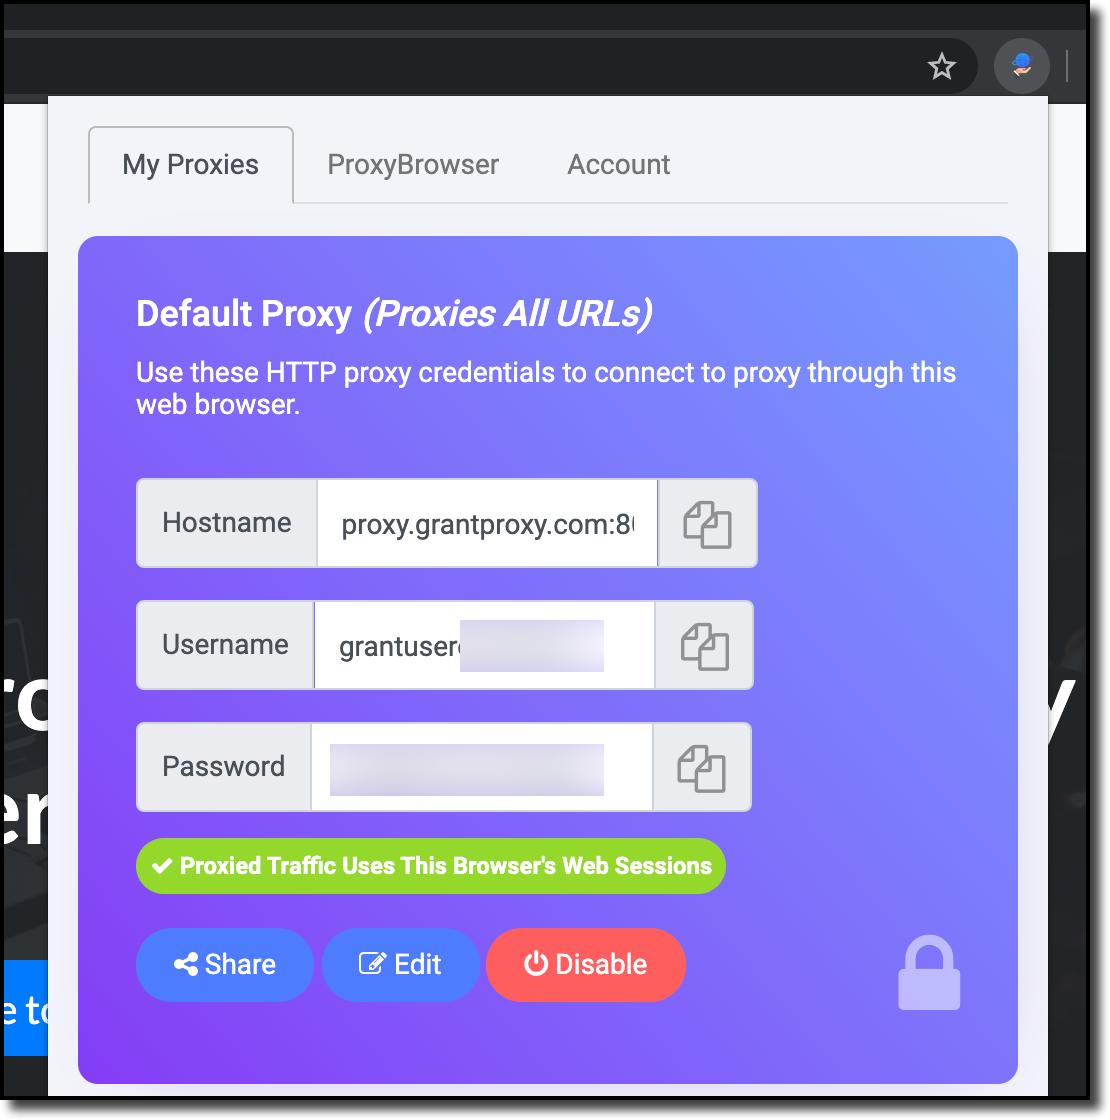
By default this proxy has the following settings:
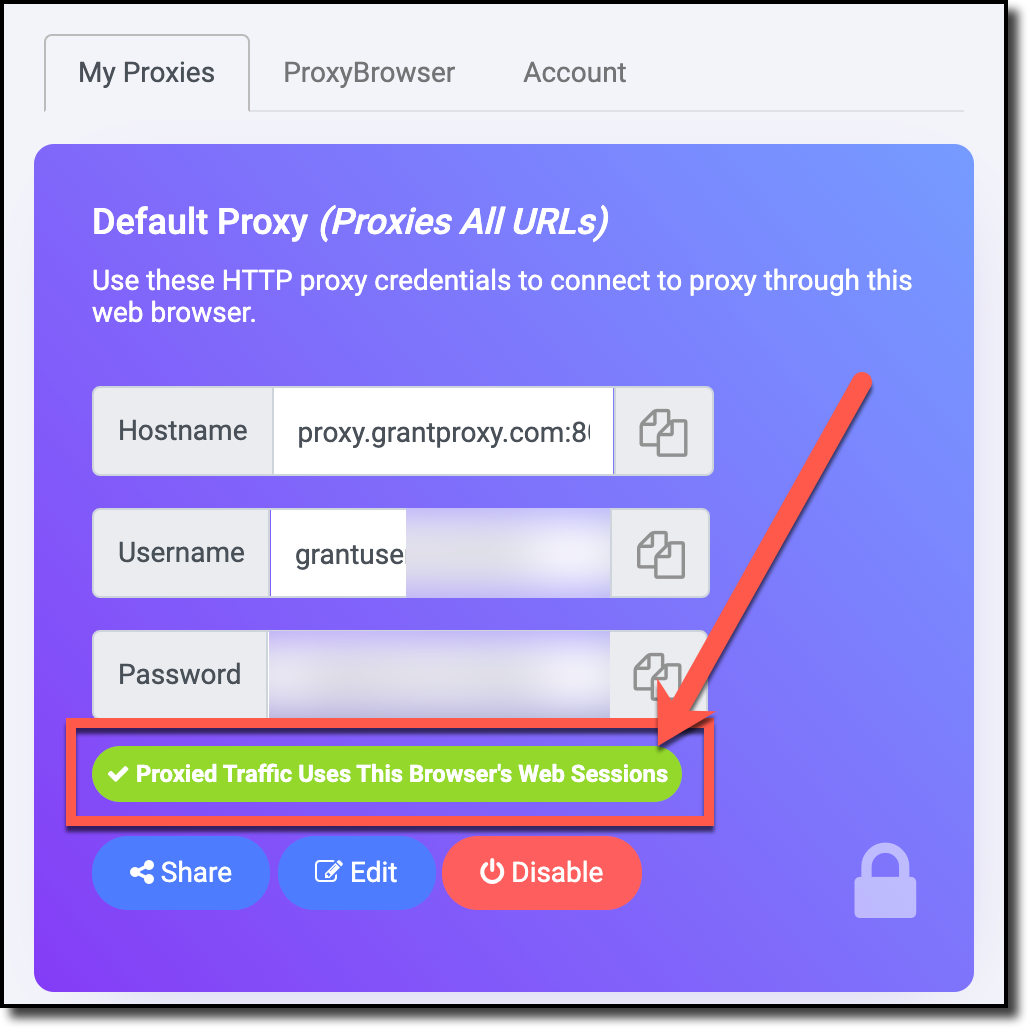
- All requests proxied through it will automatically use the browser's existing web sessions. This is denoted by the
Proxied Traffic Uses This Browser's Web Sessionslabel. It means that if you're logged into Facebook, for example, then users proxying through this proxy will be able to browse Facebook logged in as you. This is the same for any sites you've logged into already using this web browser. - The proxy is not scoped, meaning any user proxying through it will be able to visit any website using your web browser. This is denoted by the
(Proxies All URLs)text next to the proxy's name.
These permissions are pretty broad, if you're going to have someone else besides yourself use this proxy, you'll probably want to scope things down. See the rest of this tutorial for more information on how to do this.
Creating a new proxy server
To create a new proxy server, click the Create New Proxy button at the bottom of the GrantProxy browser panel:

Once you've done so, a new proxy titled Untitled Proxy will be created and added to your list of proxies:
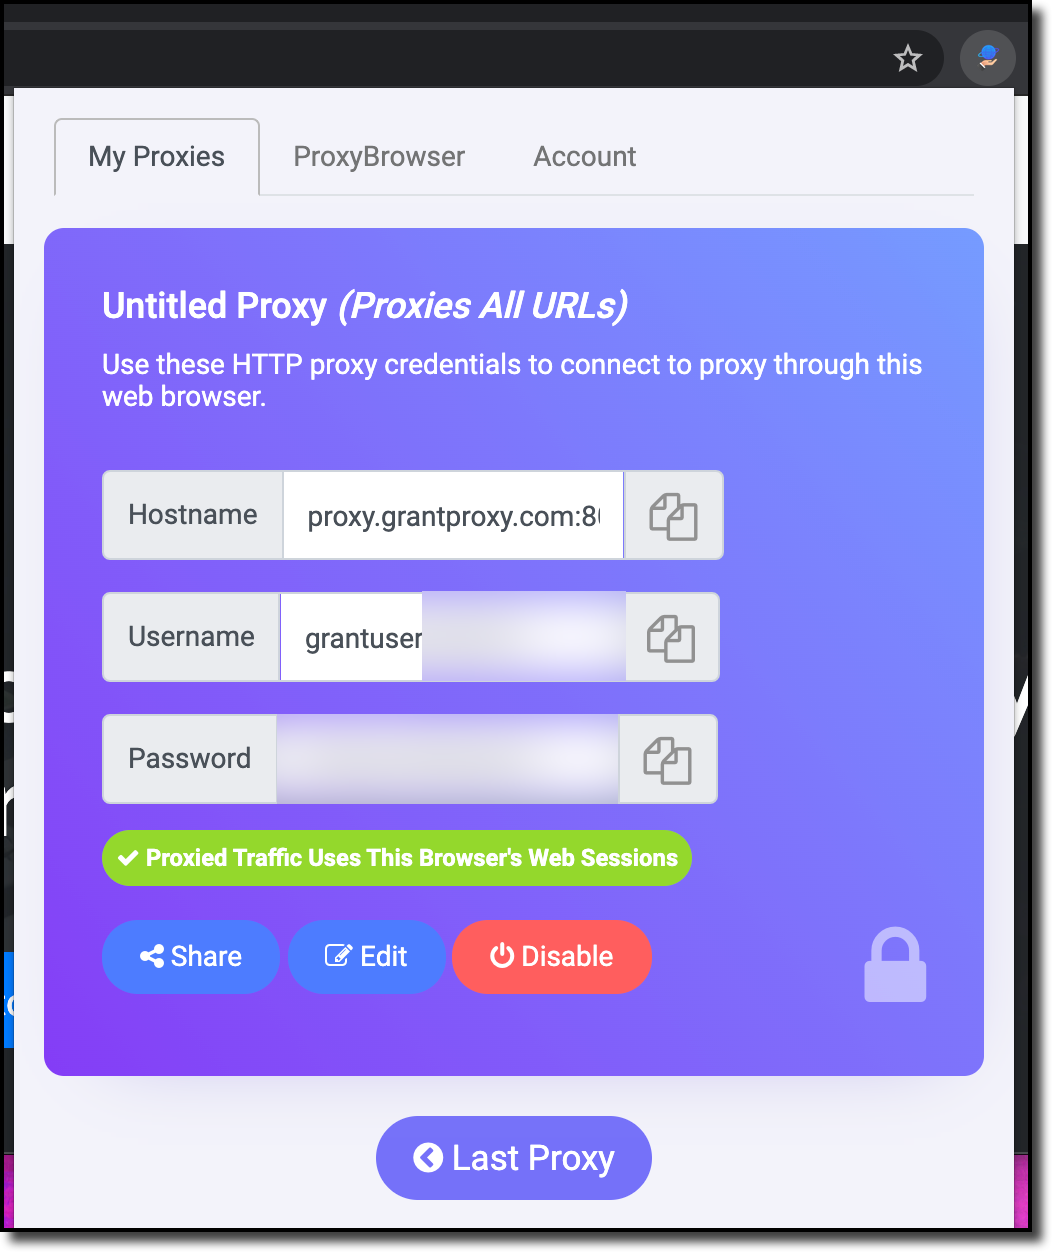
This new Untitled Proxy has the same permissions as the Default Proxy. This means that all requests will be done using your browsers existing sessions and that there are not restrictions on what URLs can be proxied.
Viewing your proxy servers
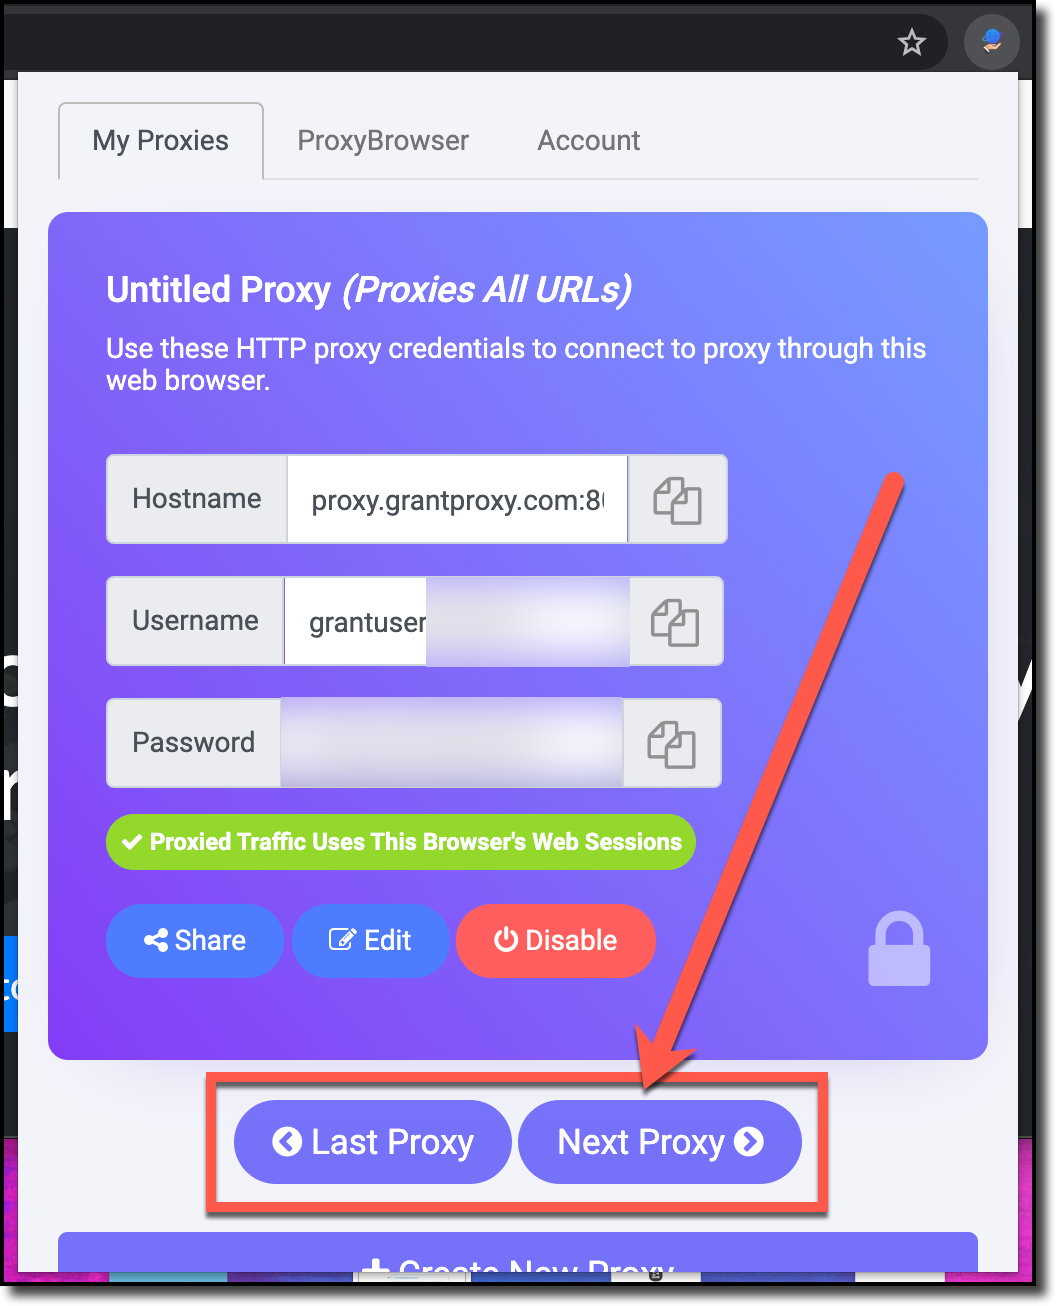
If you've created more than one proxy server you can navigate between the proxies using the Next Proxy and Last Proxy buttons available at the bottom of the GrantProxy browser panel:
Proxy with & without browser sessions
One of the most important settings of a GrantProxy proxy is whether the proxy is configured to use the browser's web sessions.
This is perhaps one of GrantProxy's most unique features. If a proxy is configured to use the browsers sessions for proxied requests, then someone using the proxy will be able to browse all of the proxied webpages authenticated as you. That means that, for example, if you're logged into Facebook.com and someone uses your proxy to visit Facebook.com they will be browsing Facebook logged in as you. They will be able to make posts, change your Facebook settings, and more.
While there are plenty of reasonable situations where you'd want to do this (sharing access to an online account to multiple people), it's also something you should be careful with. Accidentally oversharing access to a proxy which users your browser's sessions can lead to potentially unwanted access to your online accounts.
If a proxy has the Proxied Traffic Uses This Browser's Web Sessions label, this means it's configured to use your browser's web sessions:
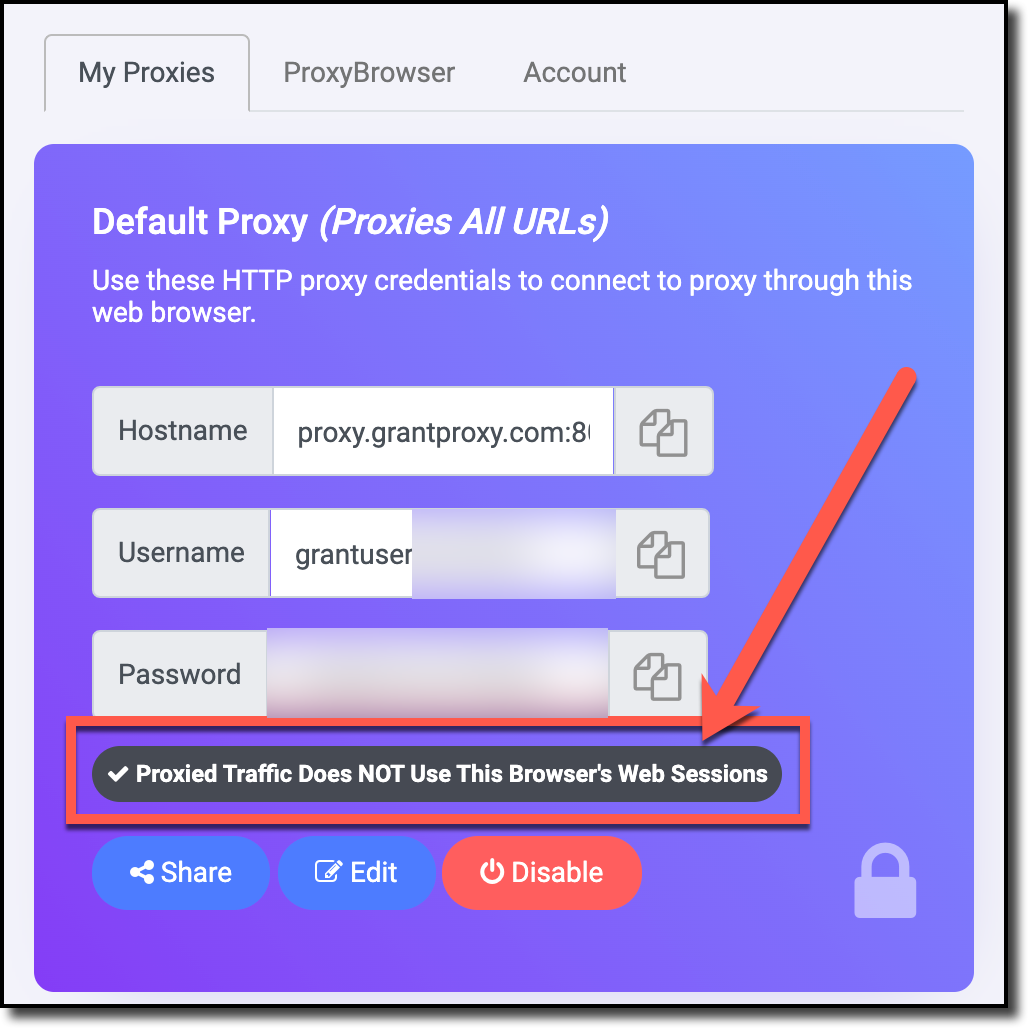
If a proxy has the Proxied Traffic Does NOT Use This Browser's Web Session label, this means the proxy is not using any of your browser's web sessions. All requests proxied through your browser will be unauthenticated:
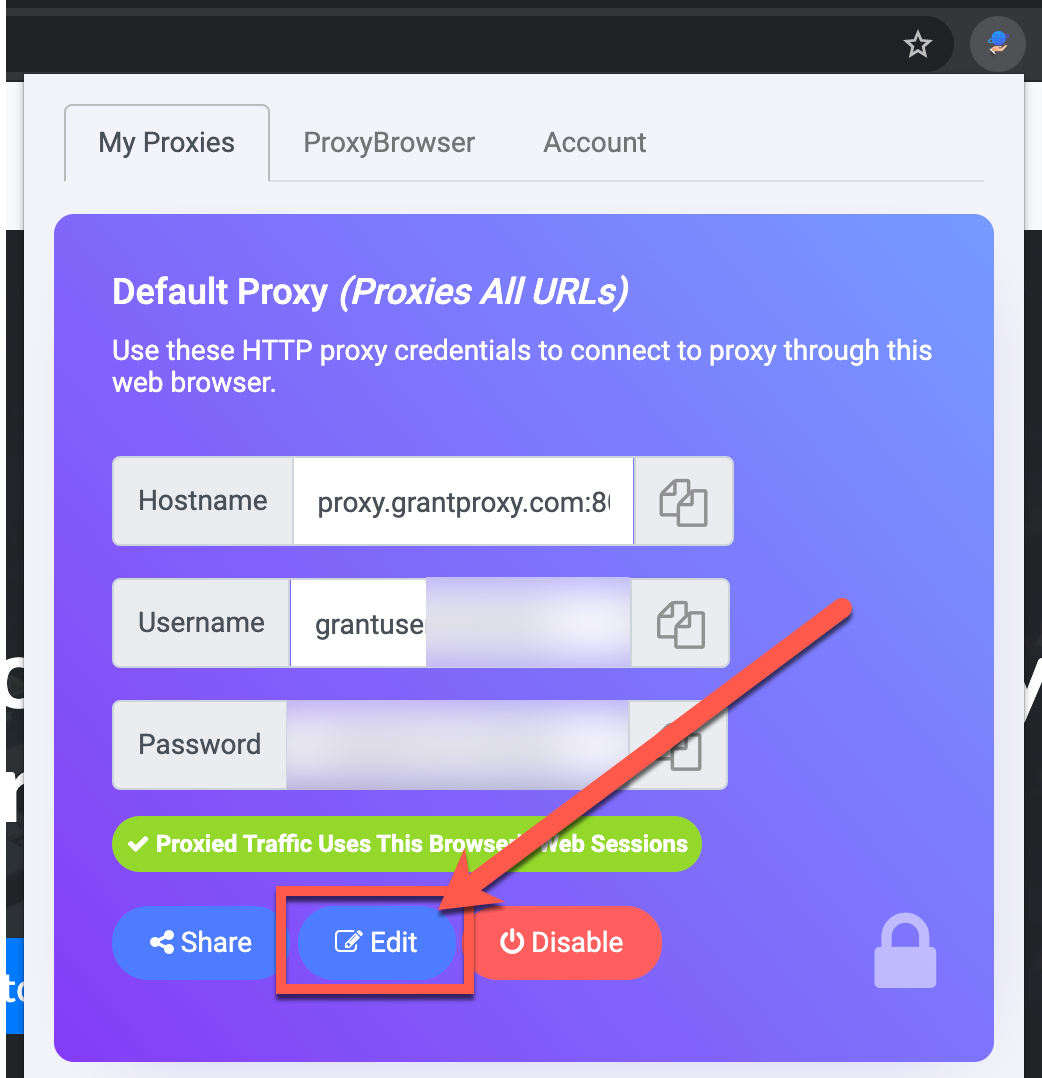
You can configure a proxy to use or not use your browser's web sessions by clicking the Edit button for the proxy you want to modify:
Then you can check or uncheck the box next to the Proxied Traffic Uses This Browser's Web Sessions text to configure if you want to use the browser's web sessions or not:
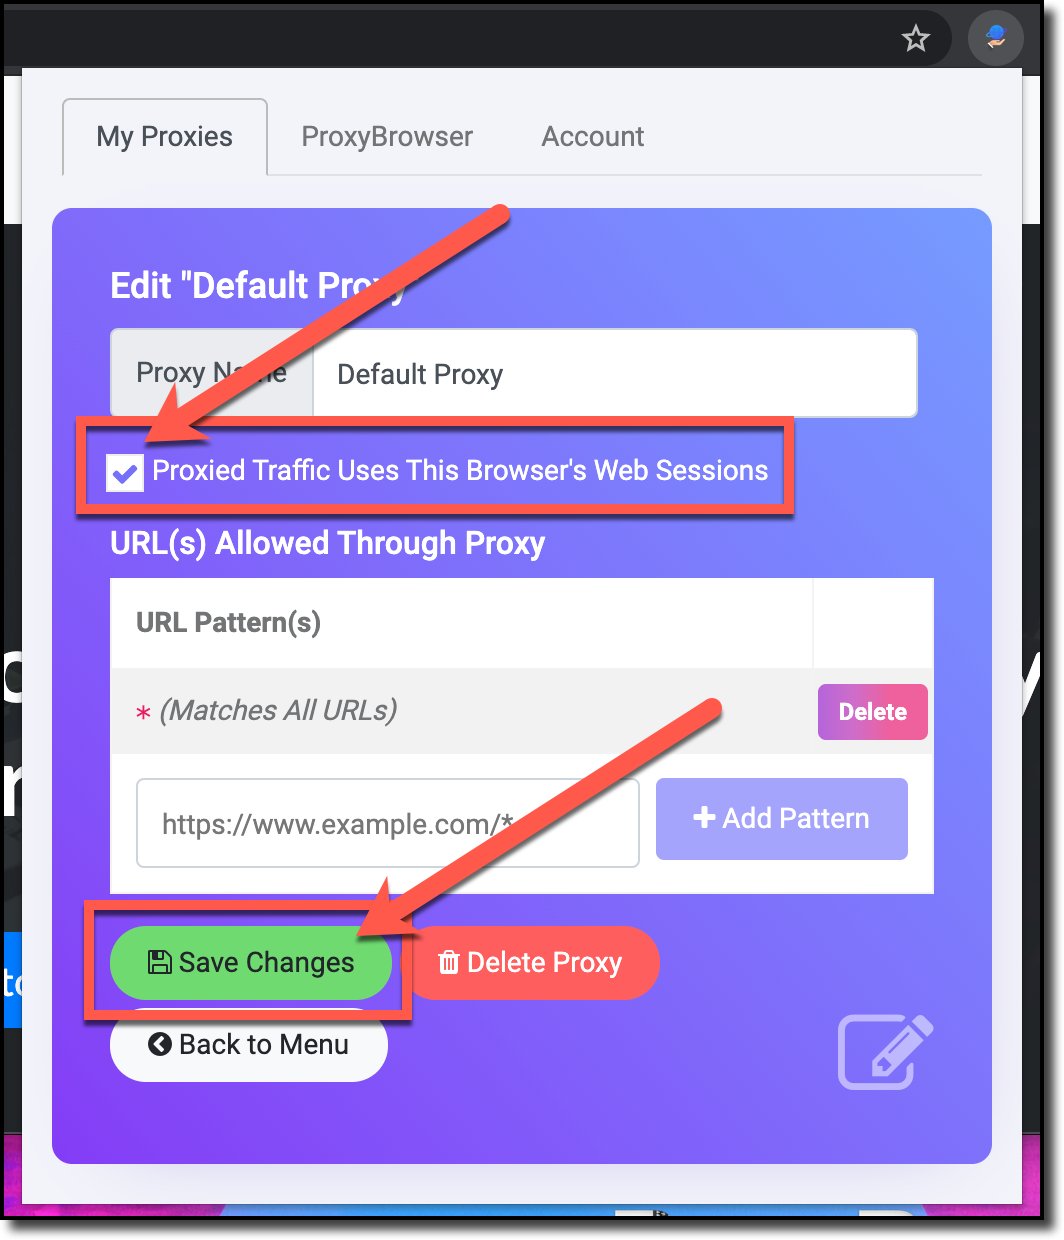
Once you've made your changes, click the Save Changes button to save the new settings.
A note about proxies that don't use your browser's web sessions
If a proxy is configured not to use your browser's web sessions then all proxied requests will be unauthenticated. Proxied requests will still come from your browser and will come from your IP address. You should note that if you don't restrict what URLs the proxy can access, then someone using your proxy may be able to access internal network sites like your wireless router (e.g. by visting 192.168.1.1 using your web browser).
Restrict proxy-allowed sites
If you want to share a proxy with someone else you'll likely want to restrict which sites they can browse using your web browser proxy. To edit which sites can be visited through your proxy click the Edit button on the proxy you want to modify:
Once you've done so you'll see the settings page has a section titled URL(s) Allowed Through Proxy. This is a list of all the URL pattern(s) for what URL(s) can be visiting using this proxy:
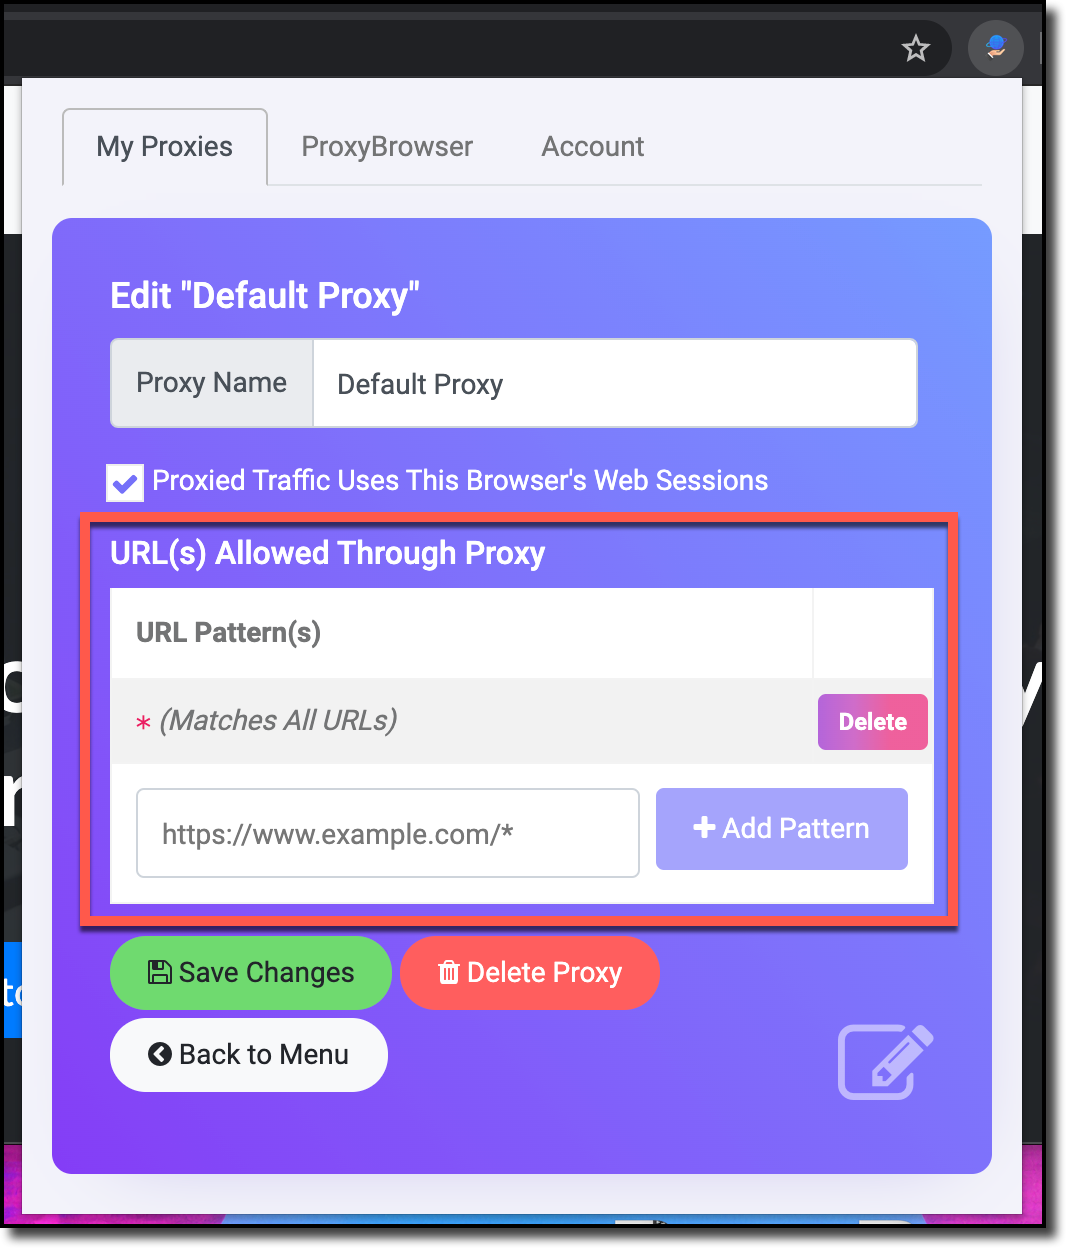
In the above screenshot there is only one line with the text * (Matches all URLs). A line containing just an asterisk (*) indicates that any URL may be visiting through the proxy.
Example URL patterns
Wildcards are used to match multiple URL(s) when you want to allow an entire group of URL(s) to be proxied. Here are some examples of wildcard URL patterns and what they allow and don't allow:
*: A single asterisk means "Match all URLs". This means a user can visit any URL through your proxy.https://www.reddit.com/*: An asterisk in the path of a site means that a user can visit any page onhttps://www.reddit.com.- A user can visit
https://www.reddit.com/r/pics - A user cannot visit
https://i.reddit.com/(reddit's mobile site). - A user cannot visit
https://reddit.com(notwww.)
- A user can visit
https://*.google.com/*: Match all Google subdomains and their paths.- A user can visit
https://www.google.com - A user can visit
https://mail.google.com/mail/ - A user cannot visit
https://proxy.example.google.com/page/
- A user can visit
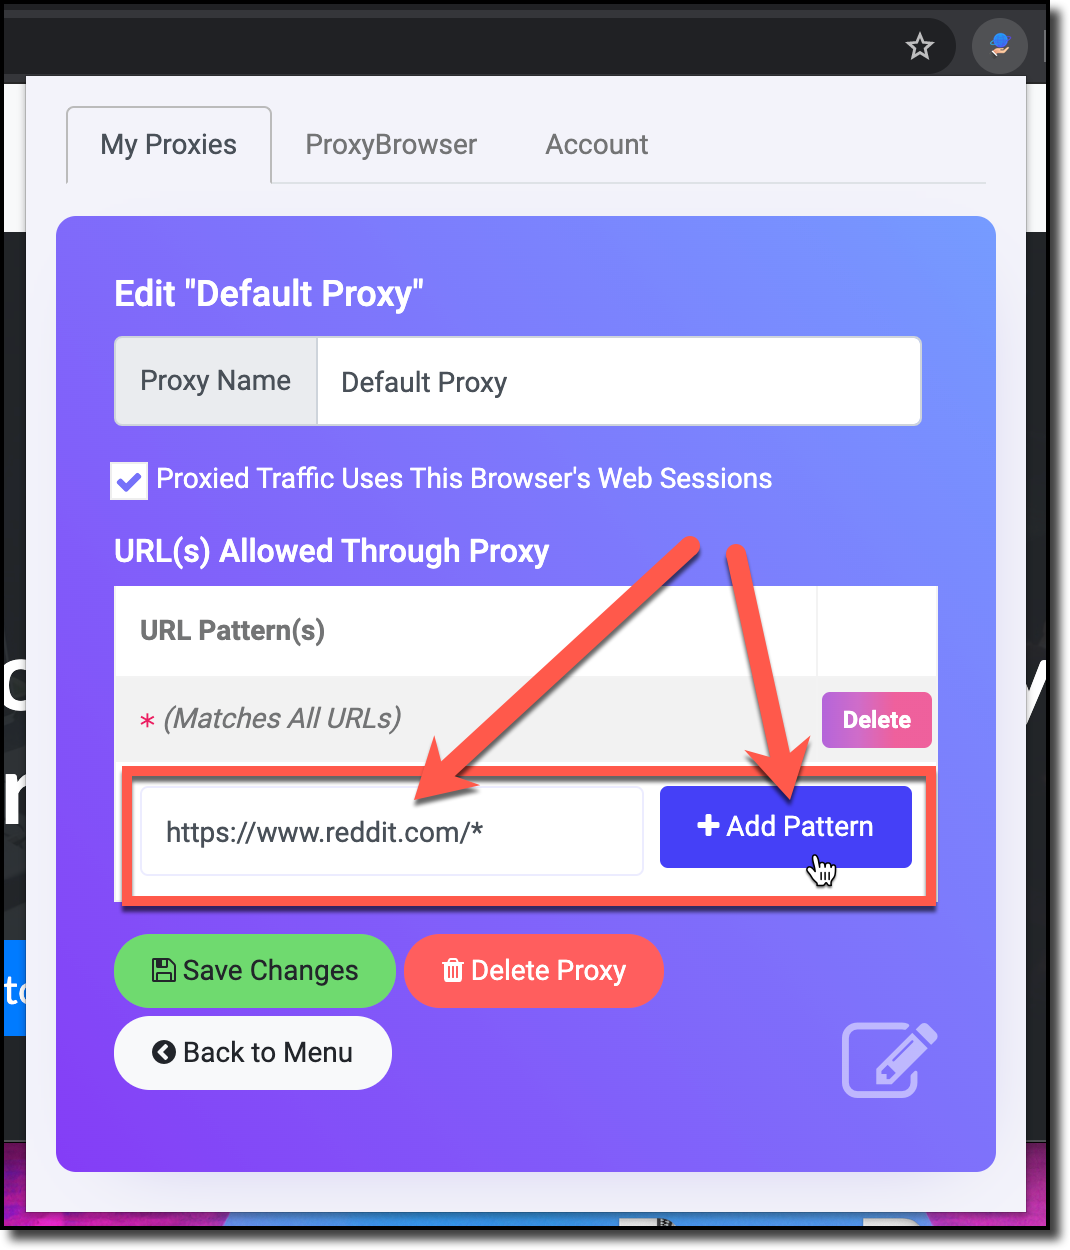
You can add a new URL pattern to your proxy by typing it into the input field and clicking the Add Pattern button:
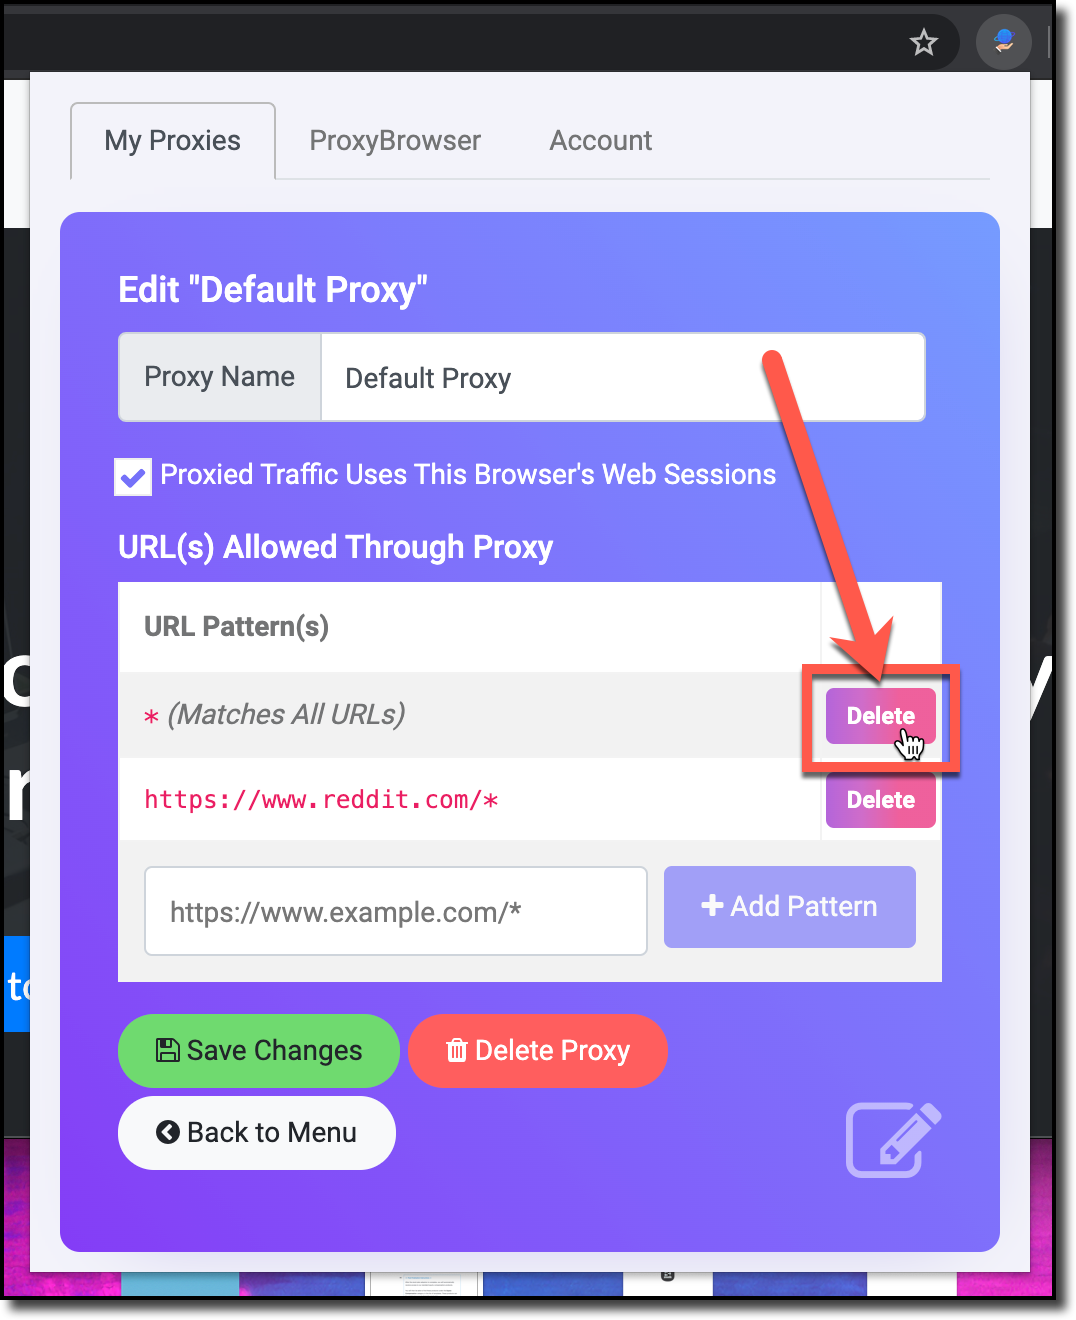
Delete existing URL patterns by clicking on the Delete button next to the URL pattern on the appropriate row:
Always Remember to Save
It's important to always remember to click Save Changes after making any proxy settings changes. Otherwise your changes will not be saved.
Disable/Enable proxy
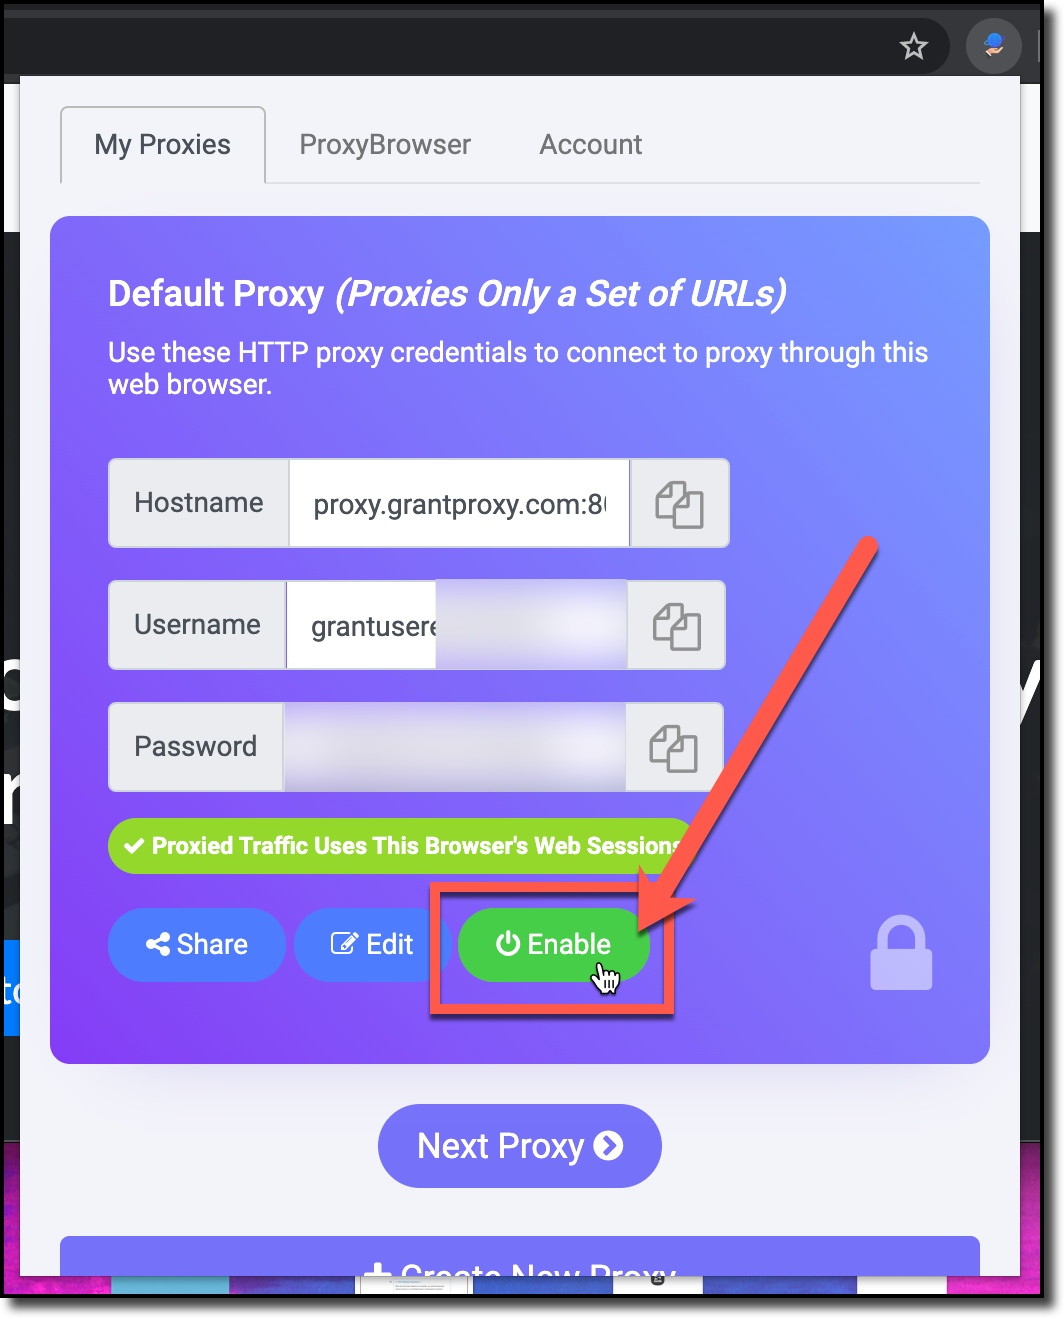
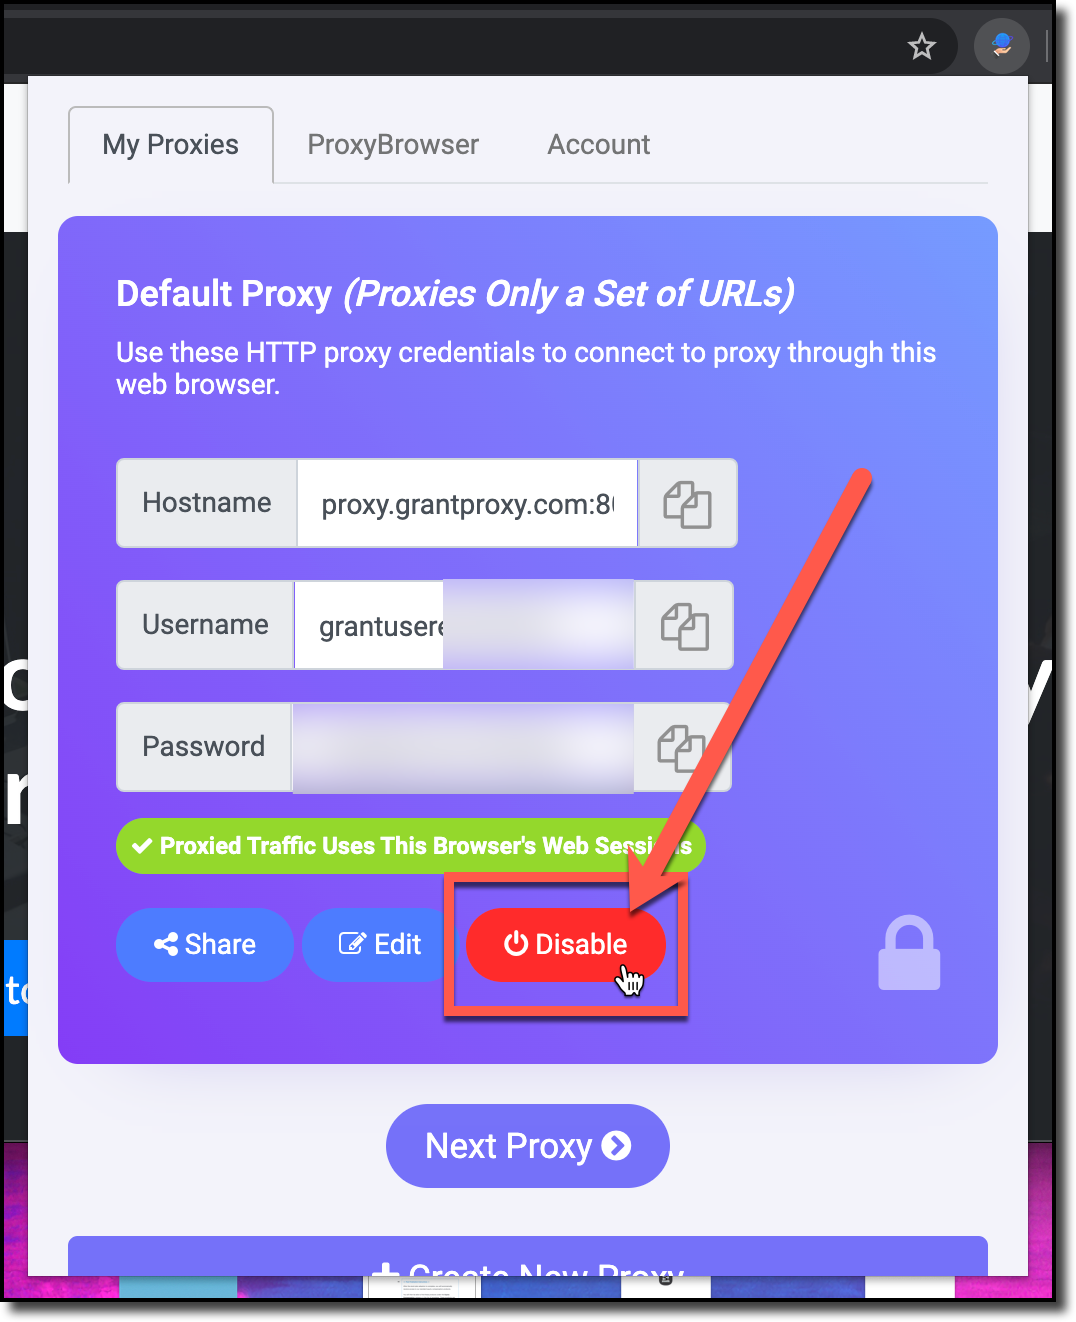
You can disable a created proxy at any time to temporarily pause access for anyone that the proxy has been shared with. To disable a proxy, simply click the Disable button under the appropriate proxy page:
Conversely, re-enabling the proxy works the same way, by clicking the Enable button for the proxy: